Entries in spring (8)

Thursday
May302013

goodbye spring. hello summer.


Life is flying by at light speed these days. I am already feeling spring rolling into summer. What is with this crazy weather? My head is chaotic swirl of work and kid schedules. I am trying to eek out some time to just chill. The heady smell of these Lily Of The Valley, one of my favorite flowers, remind me now and then to just breathe and to take a moment to pause and appreciate.

xx


Sunday
May192013

where the wild things are. ramp bloody mary.


It has been one of those weeks. I am really looking forward to chilling inside today on this rainy rainy Sunday.

My bed and a good book is calling me. Today is kind of perfect for this spicy Ramp Bloody Mary. You might want to brew up a batch of this ramp infused vodka while you can still get your hands on some ramps. It is super easy and great way to have ramps throughout the year, that is if you don’t get too addicted and drink it all too fast!

Take a fifth of good vodka. 

Pour it into a large mason jar (I used a Le Parfait Super)

Trim and clean between fifteen and twenty ramps. 

Remove the greens to use for something else.

Place the ramp bulbs and stems in the vodka and store in your fridge from 3 months to one year.

I left mine for a year but after three months they were fairly infused. It is up to you how long you leave them.

Mine started to break down after one year and I eventually strained them out.

Infusing can happen rather quickly but I tend to push it's limits. Check the vodka from time to time to see when you like the taste of it best.


This Bloody Mary is rather spicy and full of horseradish. I like it that way but you can obviously tweak the spices to your liking.

I add crushed juniper to mine as well to give it a woodsy piney taste.

Enjoy!!


 Bloody Ramp


In a an extra large Mason Jar Mix:

3 ounces vodka ramp vodka

10 ounces tomato juice 

Juice of 1 lemon

1 teaspoon Worcestershire sauce

4 drops Tabasco sauce

1/4 teaspoon coarse black pepper

1/4 teaspoon sea salt

1/4 teaspoon homemade celery salt

3 tablespoon fresh grated horseradish 

Shake and Chill the bloody Mary mix

When The Bloody Mary mixture is good and cold; Rim the glass with homemade celery salt

Pour the mixture over crushed ice and serve

Serves two.


Garnish with pickled ramps or a crisp celery stalk.


See this post from last year for Juniper Pickled Ramps.


Celery Salt

10 fresh green celery leaves

1/4 cup sea salt. I like grey.

Combine the sea salt and the Celery leaves in a mortar and pestle and blend together until you have a fine green salt.

It may be a little wet.

You can set it out on a baking sheet to dry and then store it in airtight jar in a darkened place like a pantry or stick the jar in the freezer to store it.

The green color will slowly fade over time.


Tuesday
May142013

where the wild things are. ramp and nettle butter.

Looking back at my ramp posts from last year, I realized that I never posted a recipe for nettle and ramp butter. I posted the photos but not the recipe.

http://www.hungryghostfoodandtravel.com/new/2012/4/5/where-the-wild-things-are-no-14-nettle-and-ramp-butter.html


Since the season is in full swing I thought I would share my recipe with you. I know some of you are probably so sick of ramp but I love it. Ramp has such a fleeting season. Every year I find there is more I wish I had done with it than the year before but I seem to feel that way about all the fleeting veg, wild or otherwise. 

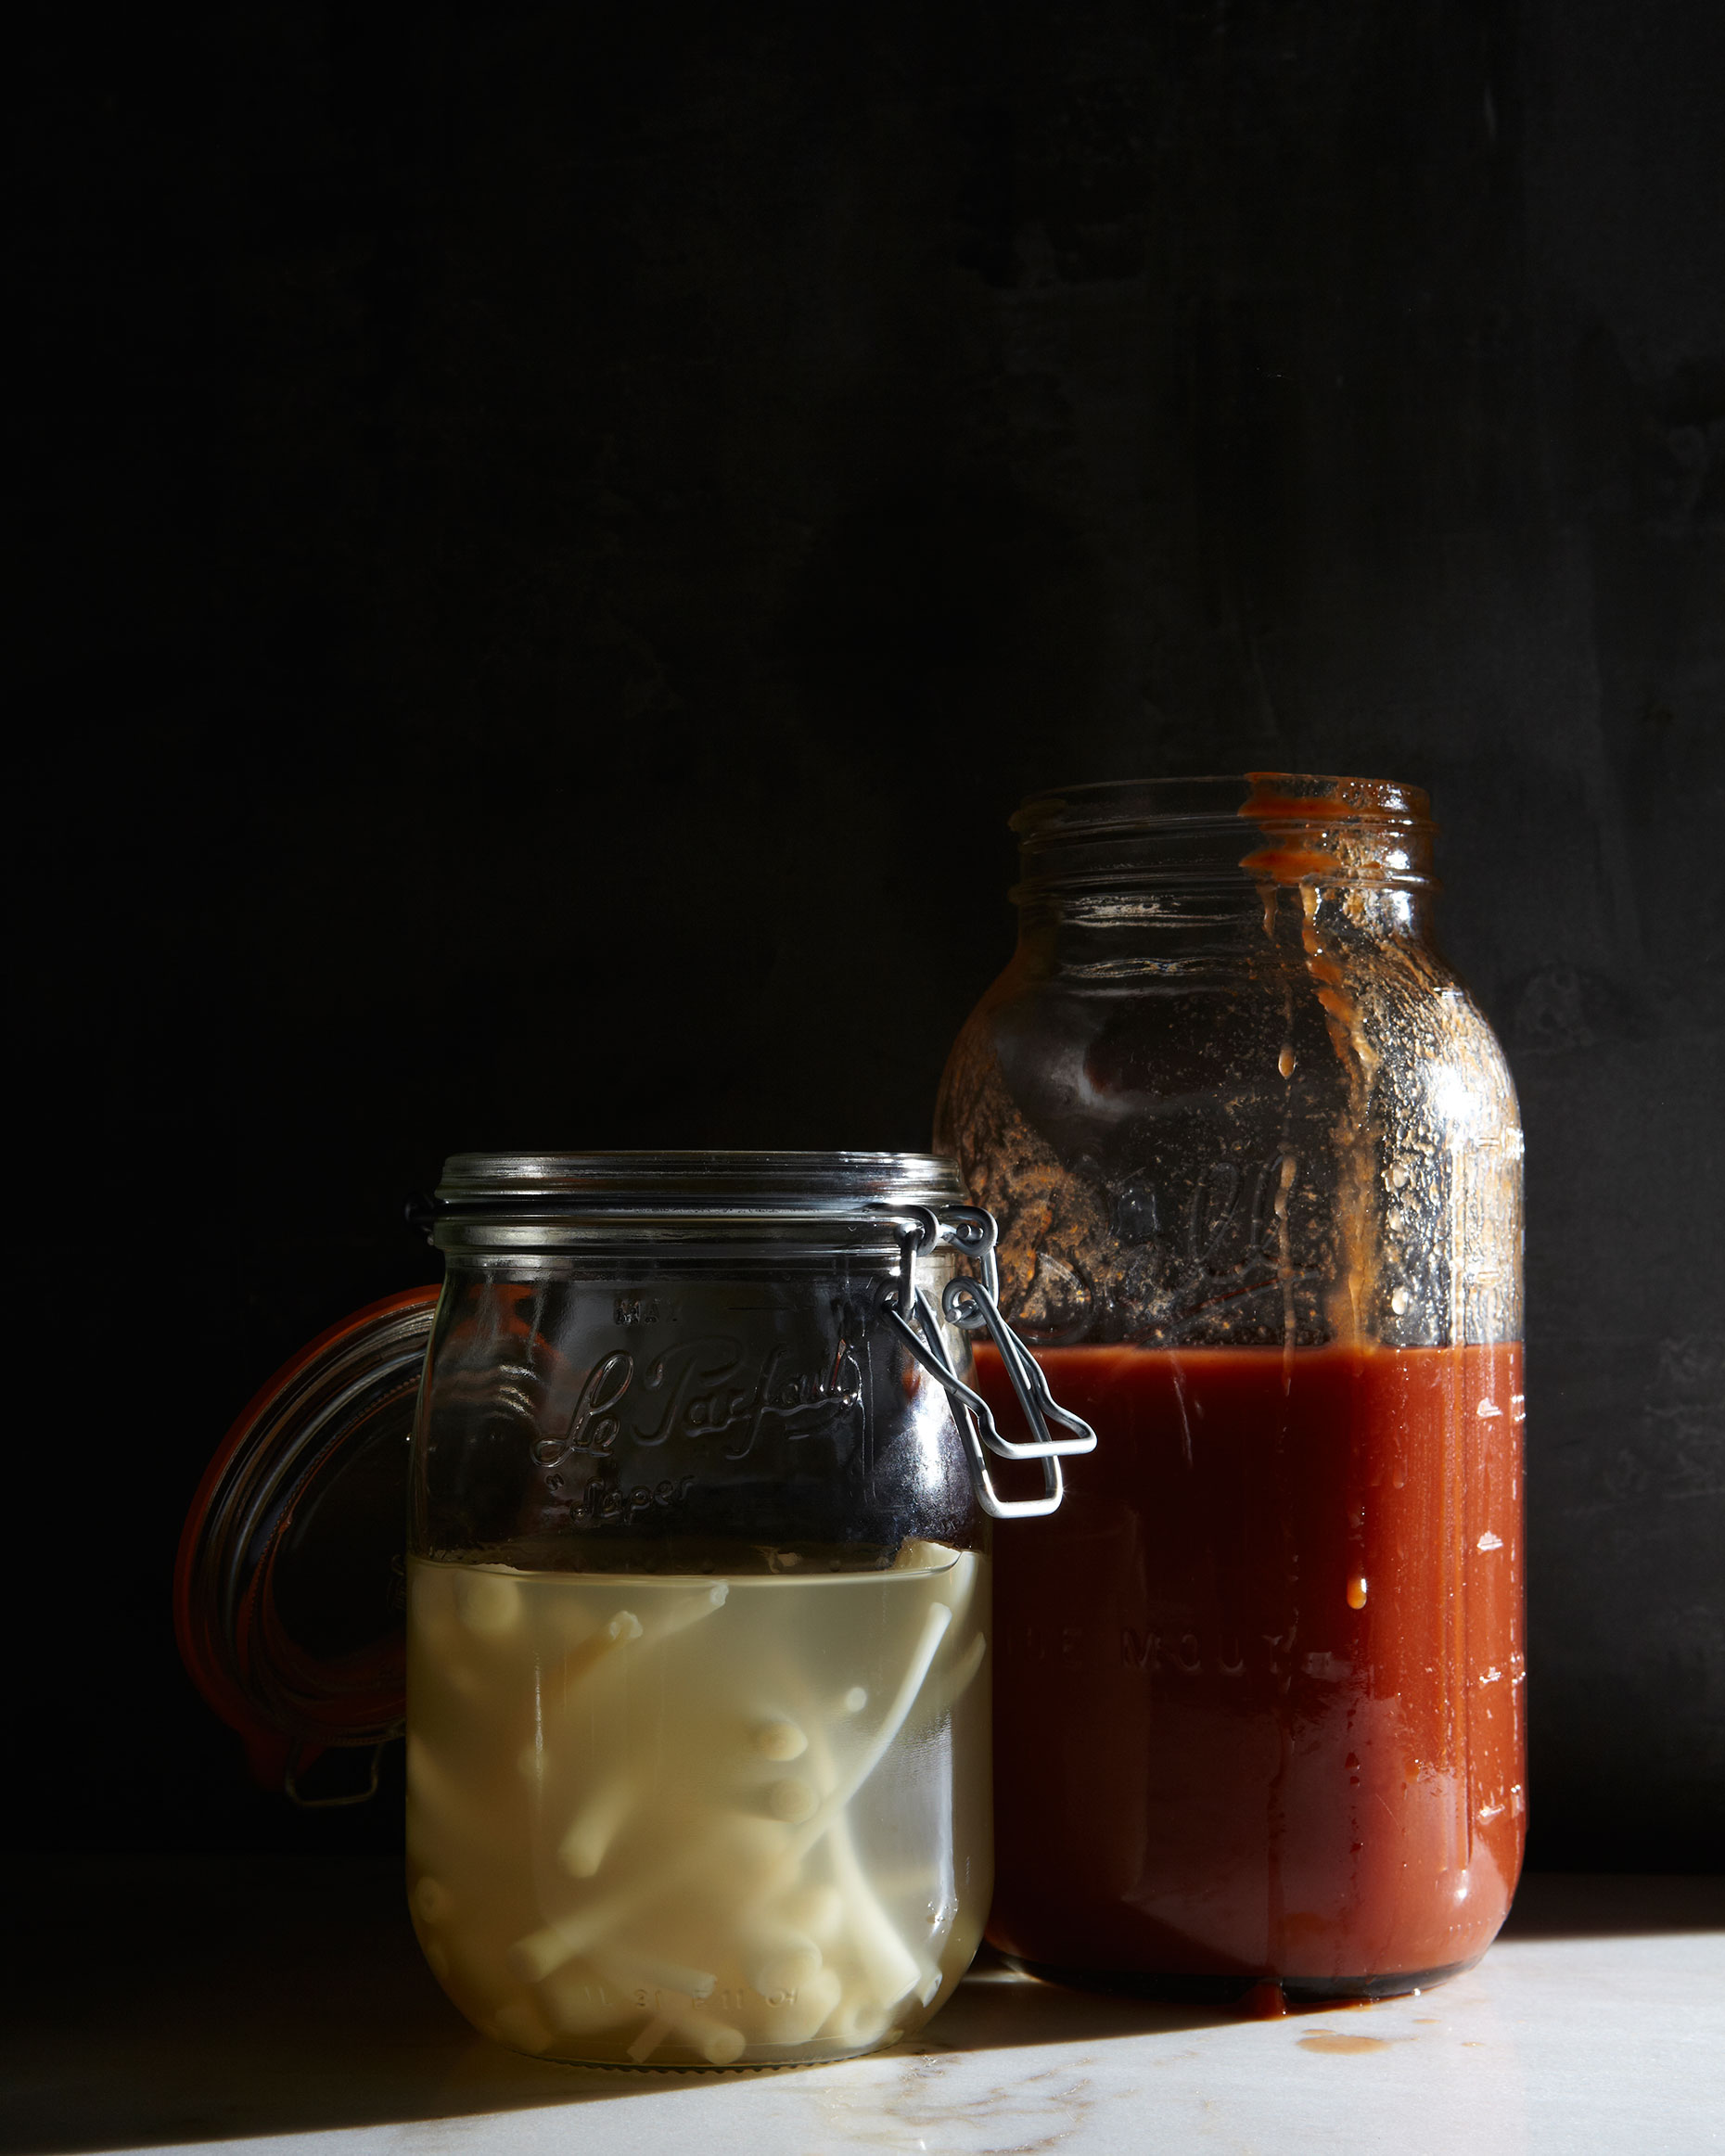
I noticed at the farmers market this past week that some of the farmers selling ramps were offering up some ramp butter. Most of the ramp butter at the market was a compound butter, which is a mixture of butter and added ingredients, like ramps, herbs or lemon. You may have had maître d’hotel butter on your steak frites? This is a compound butter.

The ramp butter I have been making is essentially a compound butter but I make it in a different way and it is a lot stronger than the  ramp butter at the market. It is more complex and deep.

 If you want to take the fast route, you can make a compound butter by adding chopped herbs or ramps to a stick of room temperature butter. You will want to mash the ingredients into the butter and fully incorporate them into the butter almost folding it over on itself again and again with a paddle or a wooden spoon.

Here is a nice tutorial on making compound butter from Serious Eats.

I make my ramp butter by whipping up fresh cream in the food processor along with chopped ramps or nettles and herbs, depending on what kind I am making.

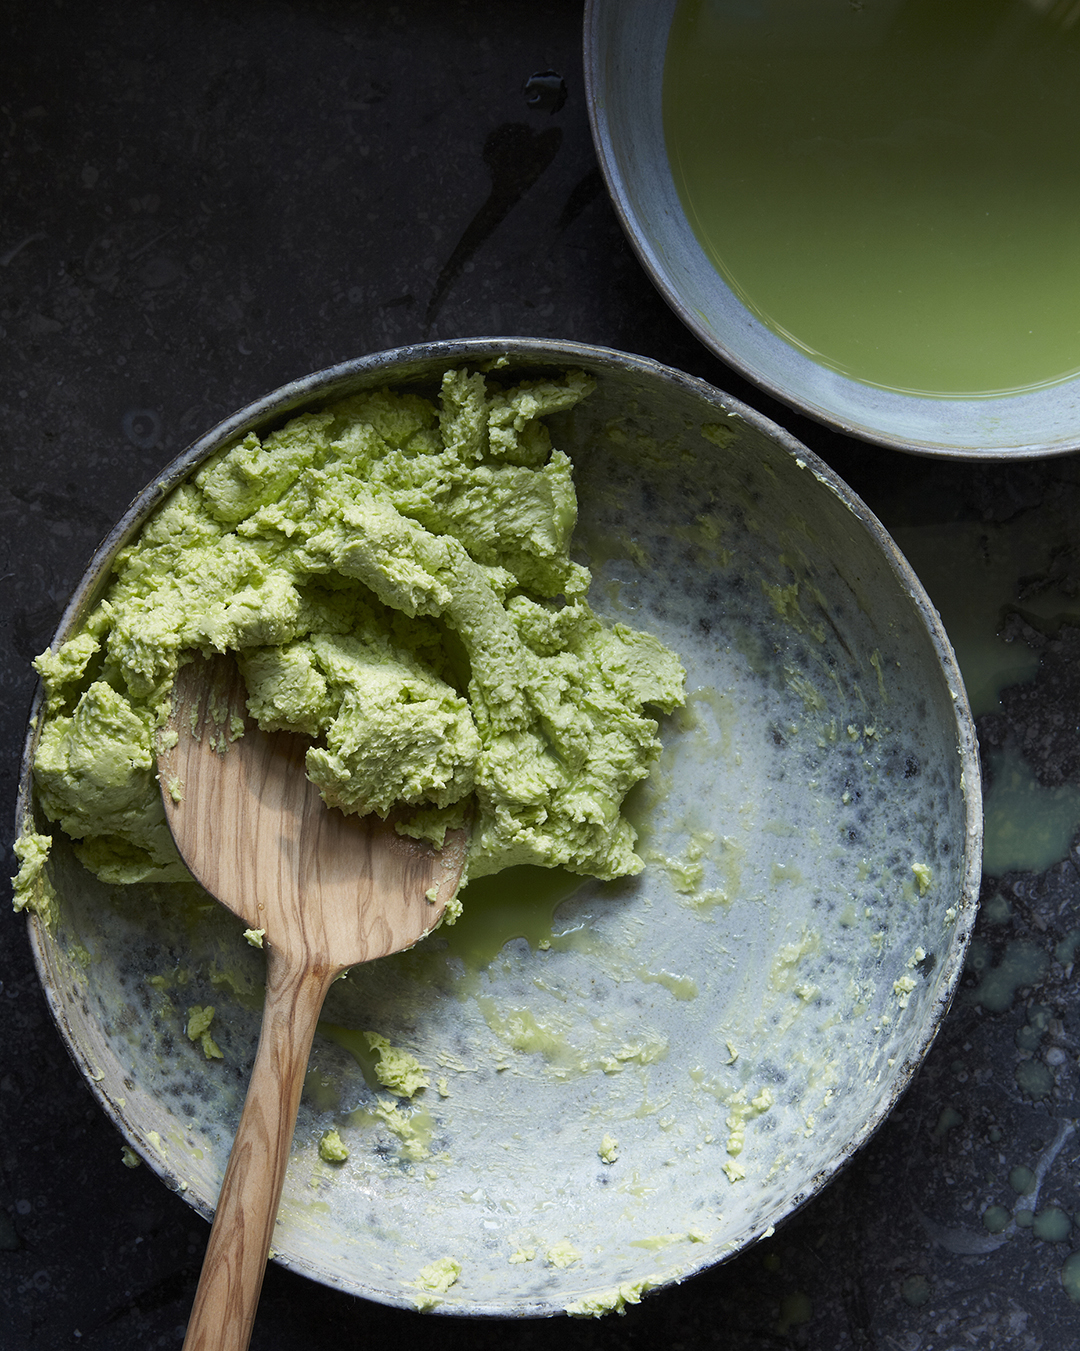
I mix the cream and herbs at a high speed in my food processor until the butter starts to separate from the buttermilk.  In a bout a minute’s time they will have formed a soft whipped cream cheese like spread. You could stop there if you would like and use it like a whipped butter but without separating the liquids from the butterfat it will not keep as long. I prefer to take it all the way to butter.

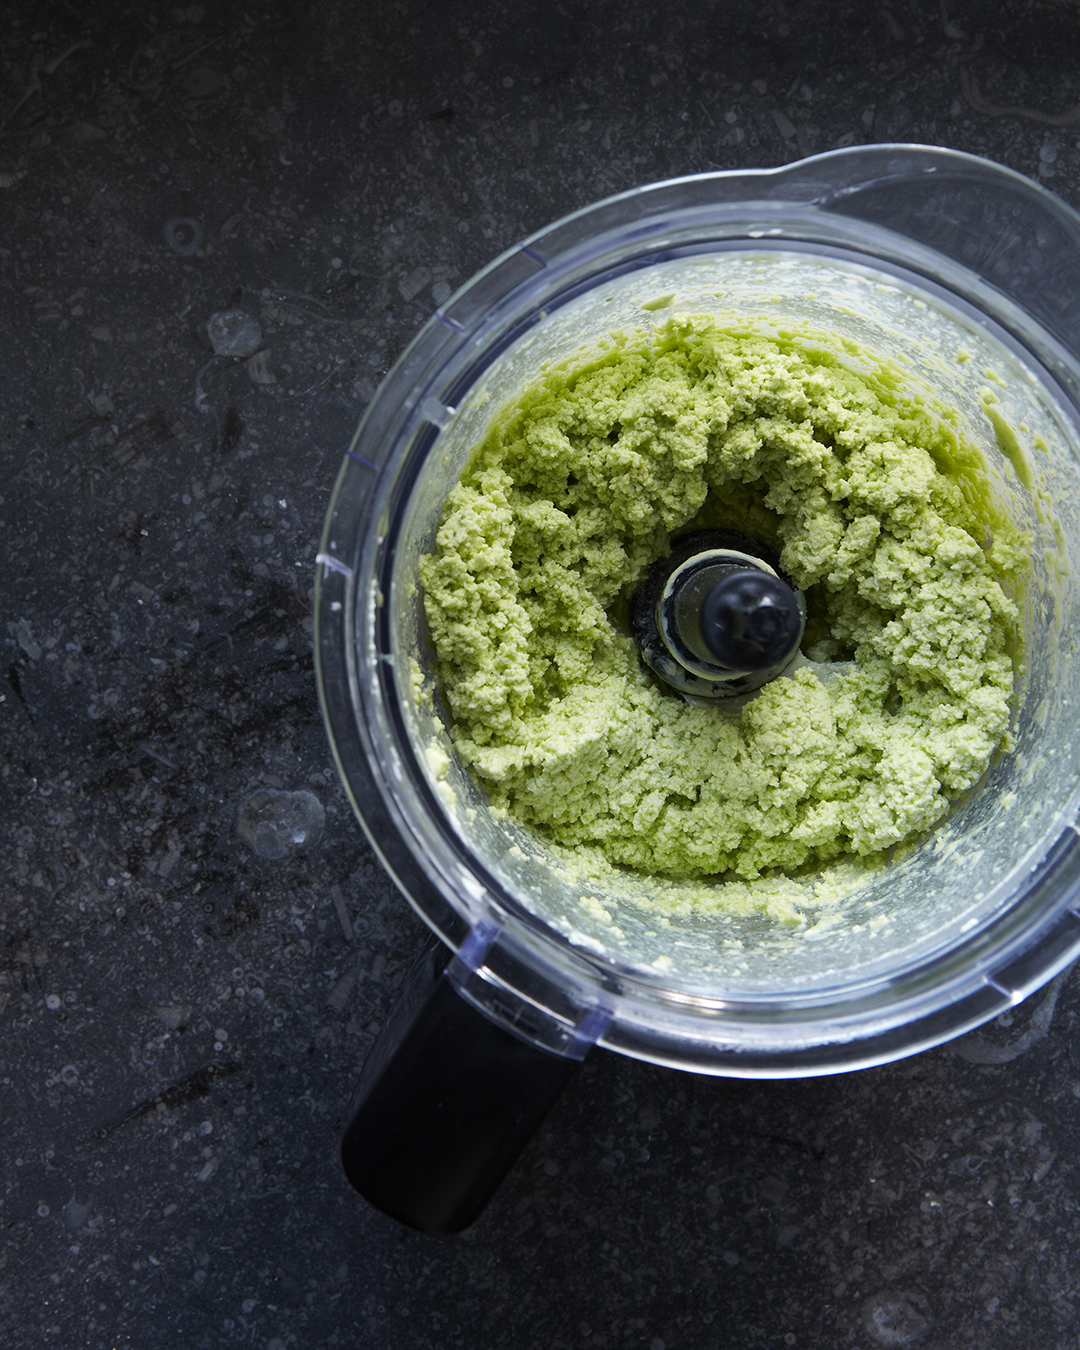
I pulse the cream and herbs until there are two bands visible through the sides of the processor. One will be a vibrant green liquid and the other will be the paler heavier fat of the butter as it separates. I keep pulsing the processor until the butter starts to slap the sides of the food processor.

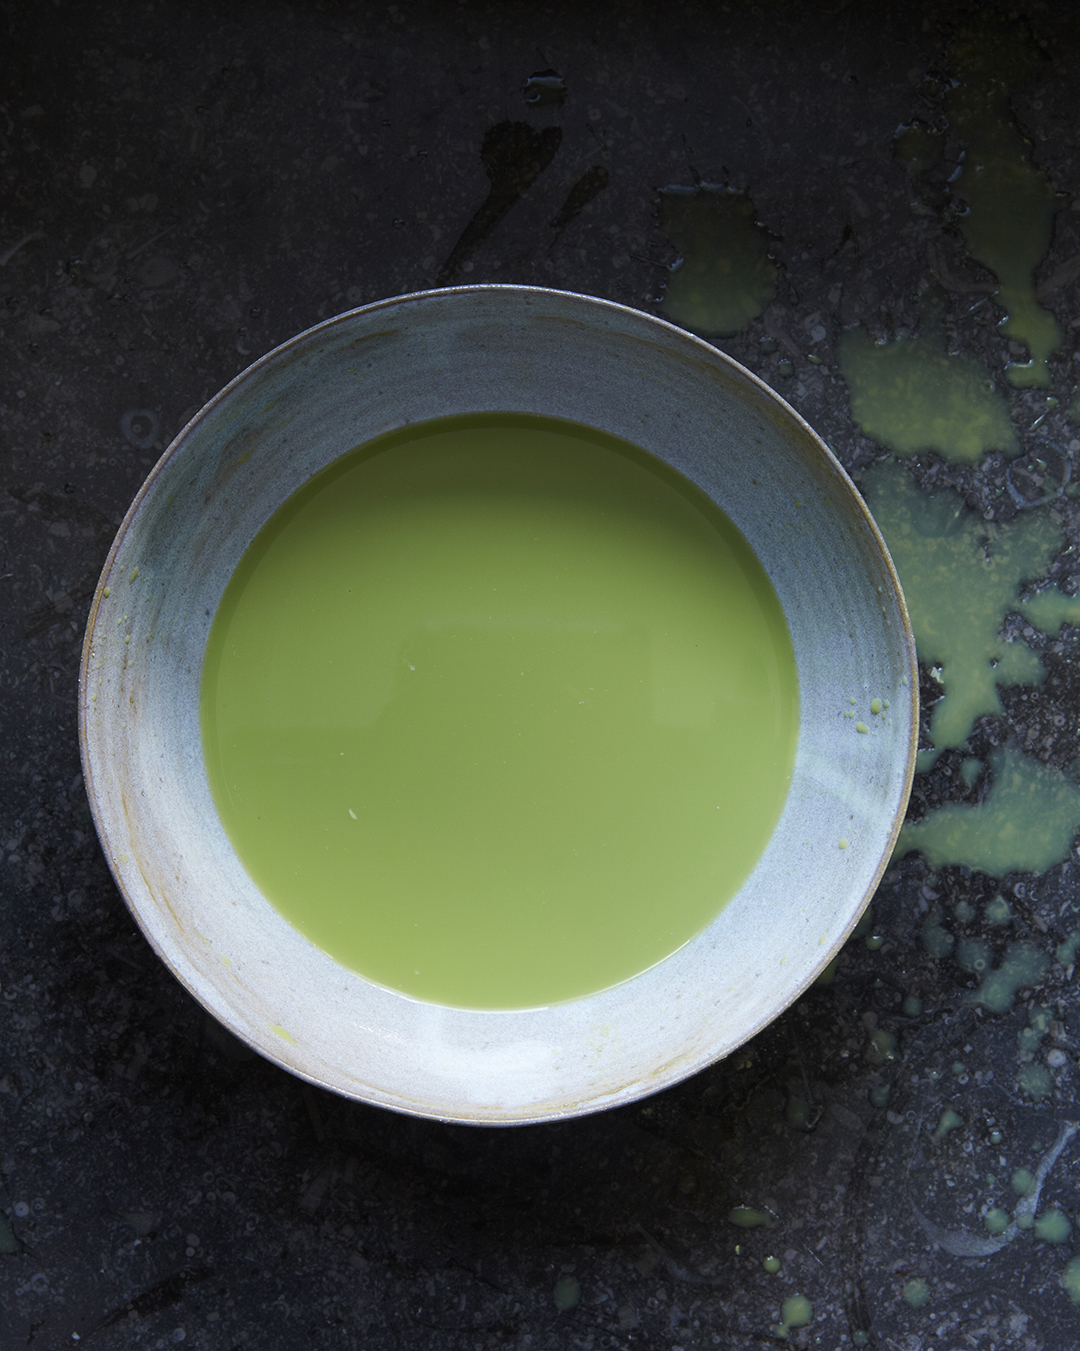
The butter will appear grainy and clumpy at this stage and it will be sitting in a pool of liquid. This liquid is technically the buttermilk, but it is not like the commercial buttermilk that you buy in the store. It is much thinner. Commercial buttermilk is generally cultured and thicker.

 You will want to drain off the liquid. If you are feeling adventurous you can reserve it for a later use. I made ramp buttermilk biscuits with mine.

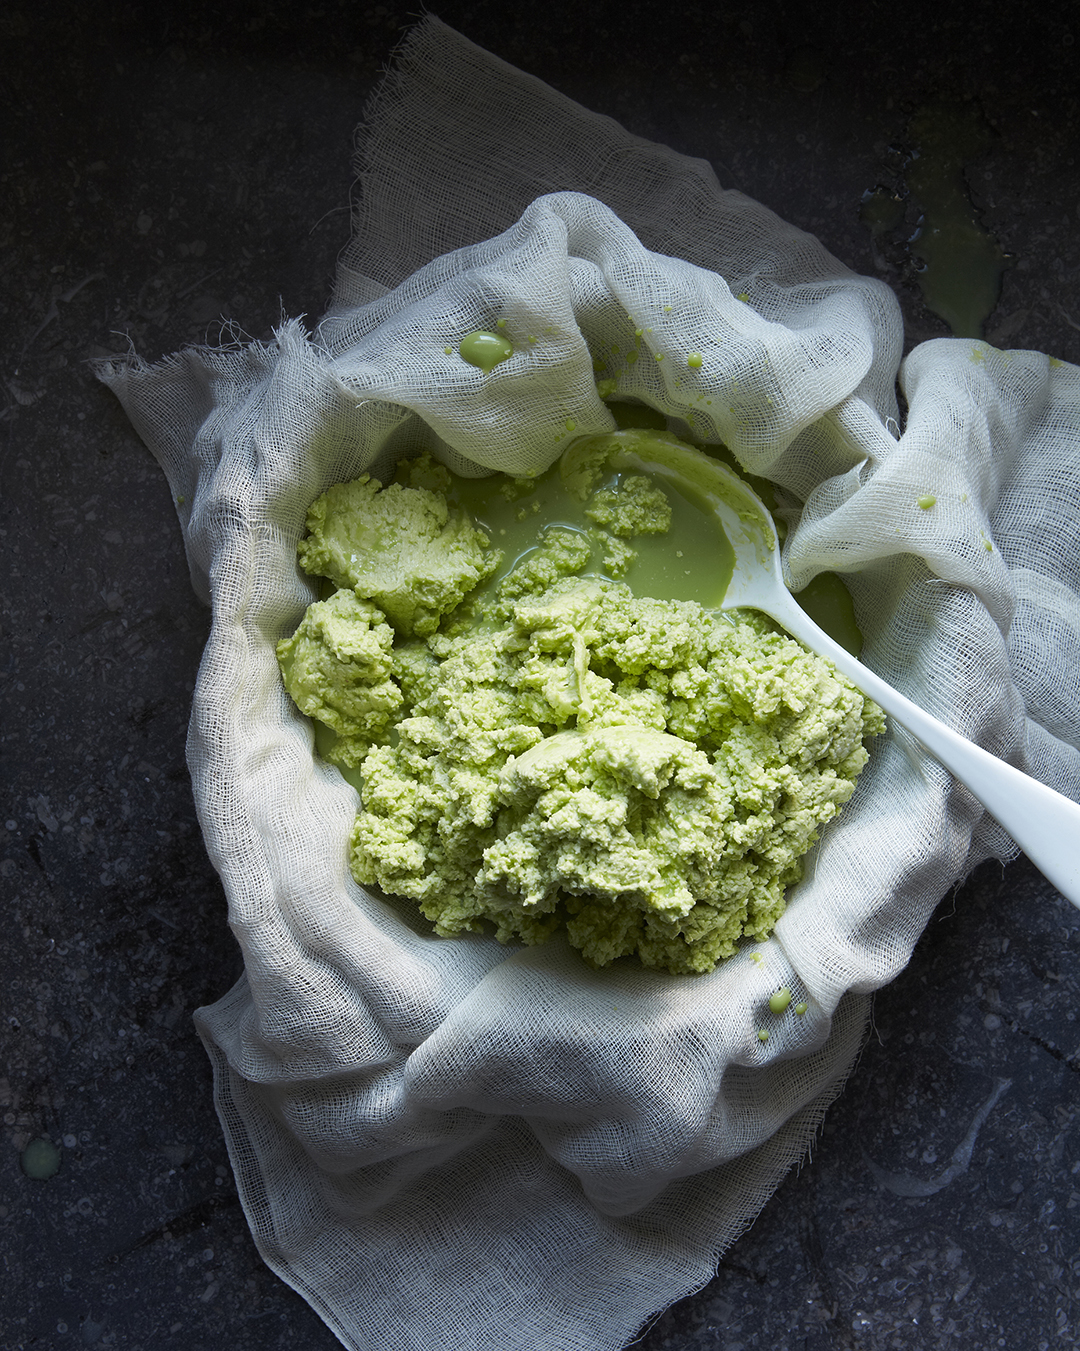
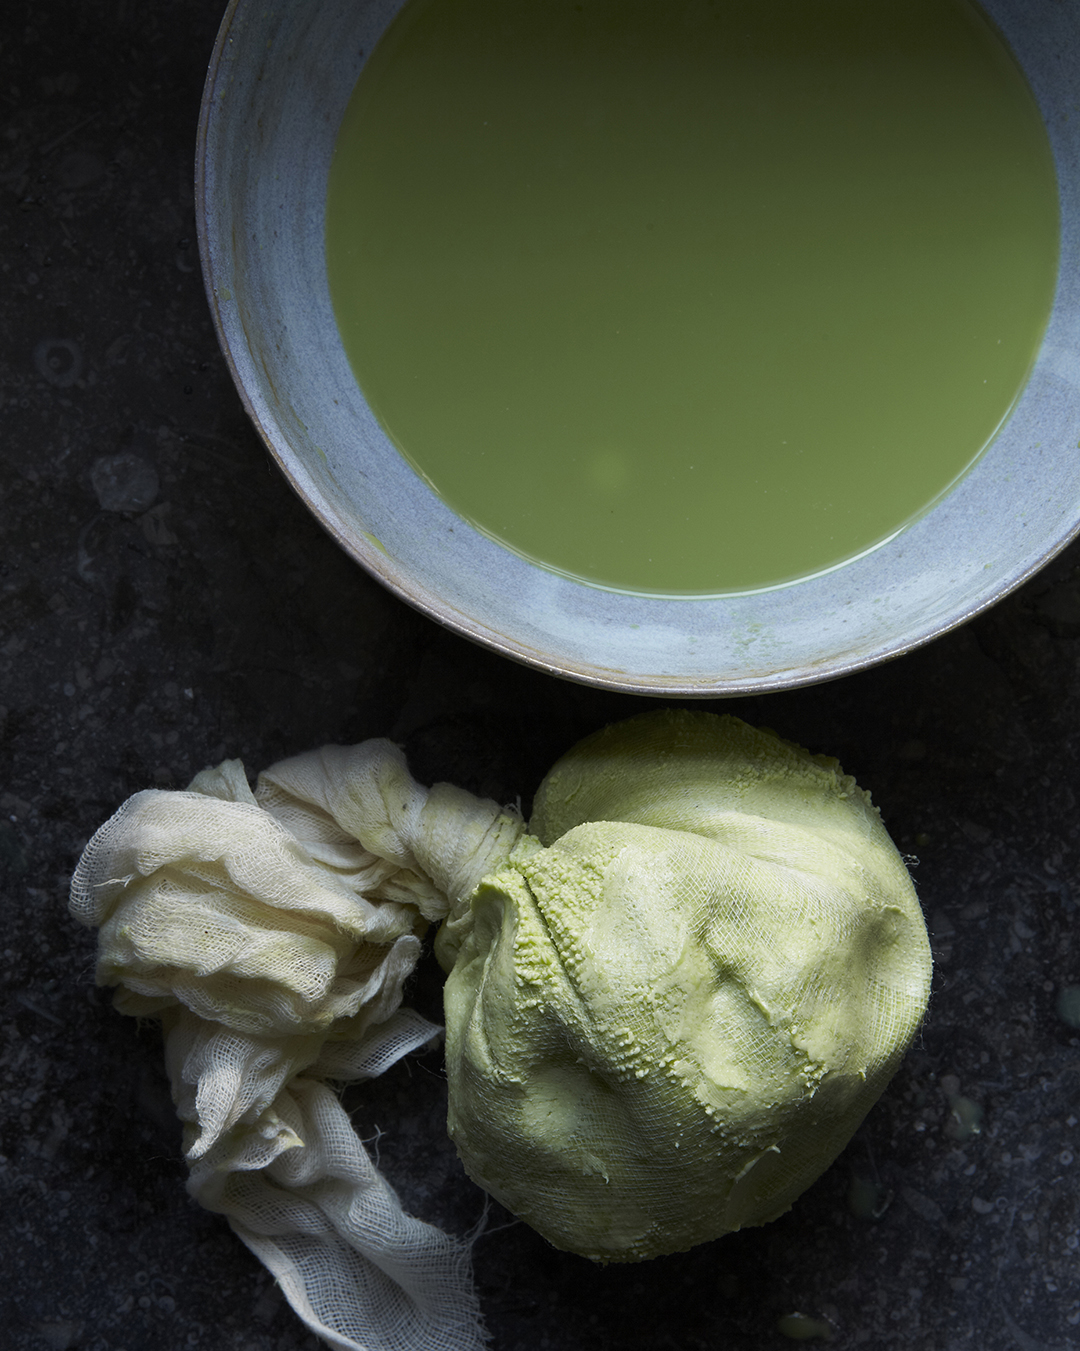
Scrape all the butter into a large piece of cheesecloth and give it good twist. The buttermilk will spurt out onto the bowl below. Drain it off into your buttermilk reserve.

You will know you have drained most of the buttermilk once the butter starts to come through the cheesecloth.

At this point stop and proceed to the ice bath.

Take a large mixing bowl and fill it with ice cubes and cold water. Spoon the butter into the ice water and gently scoop it together with your hands until you form a ball.

Let it sit in the ice bathe until it firms up for a minute or so.

Rinse the butterball under cold water and set it in a shallow bowl.

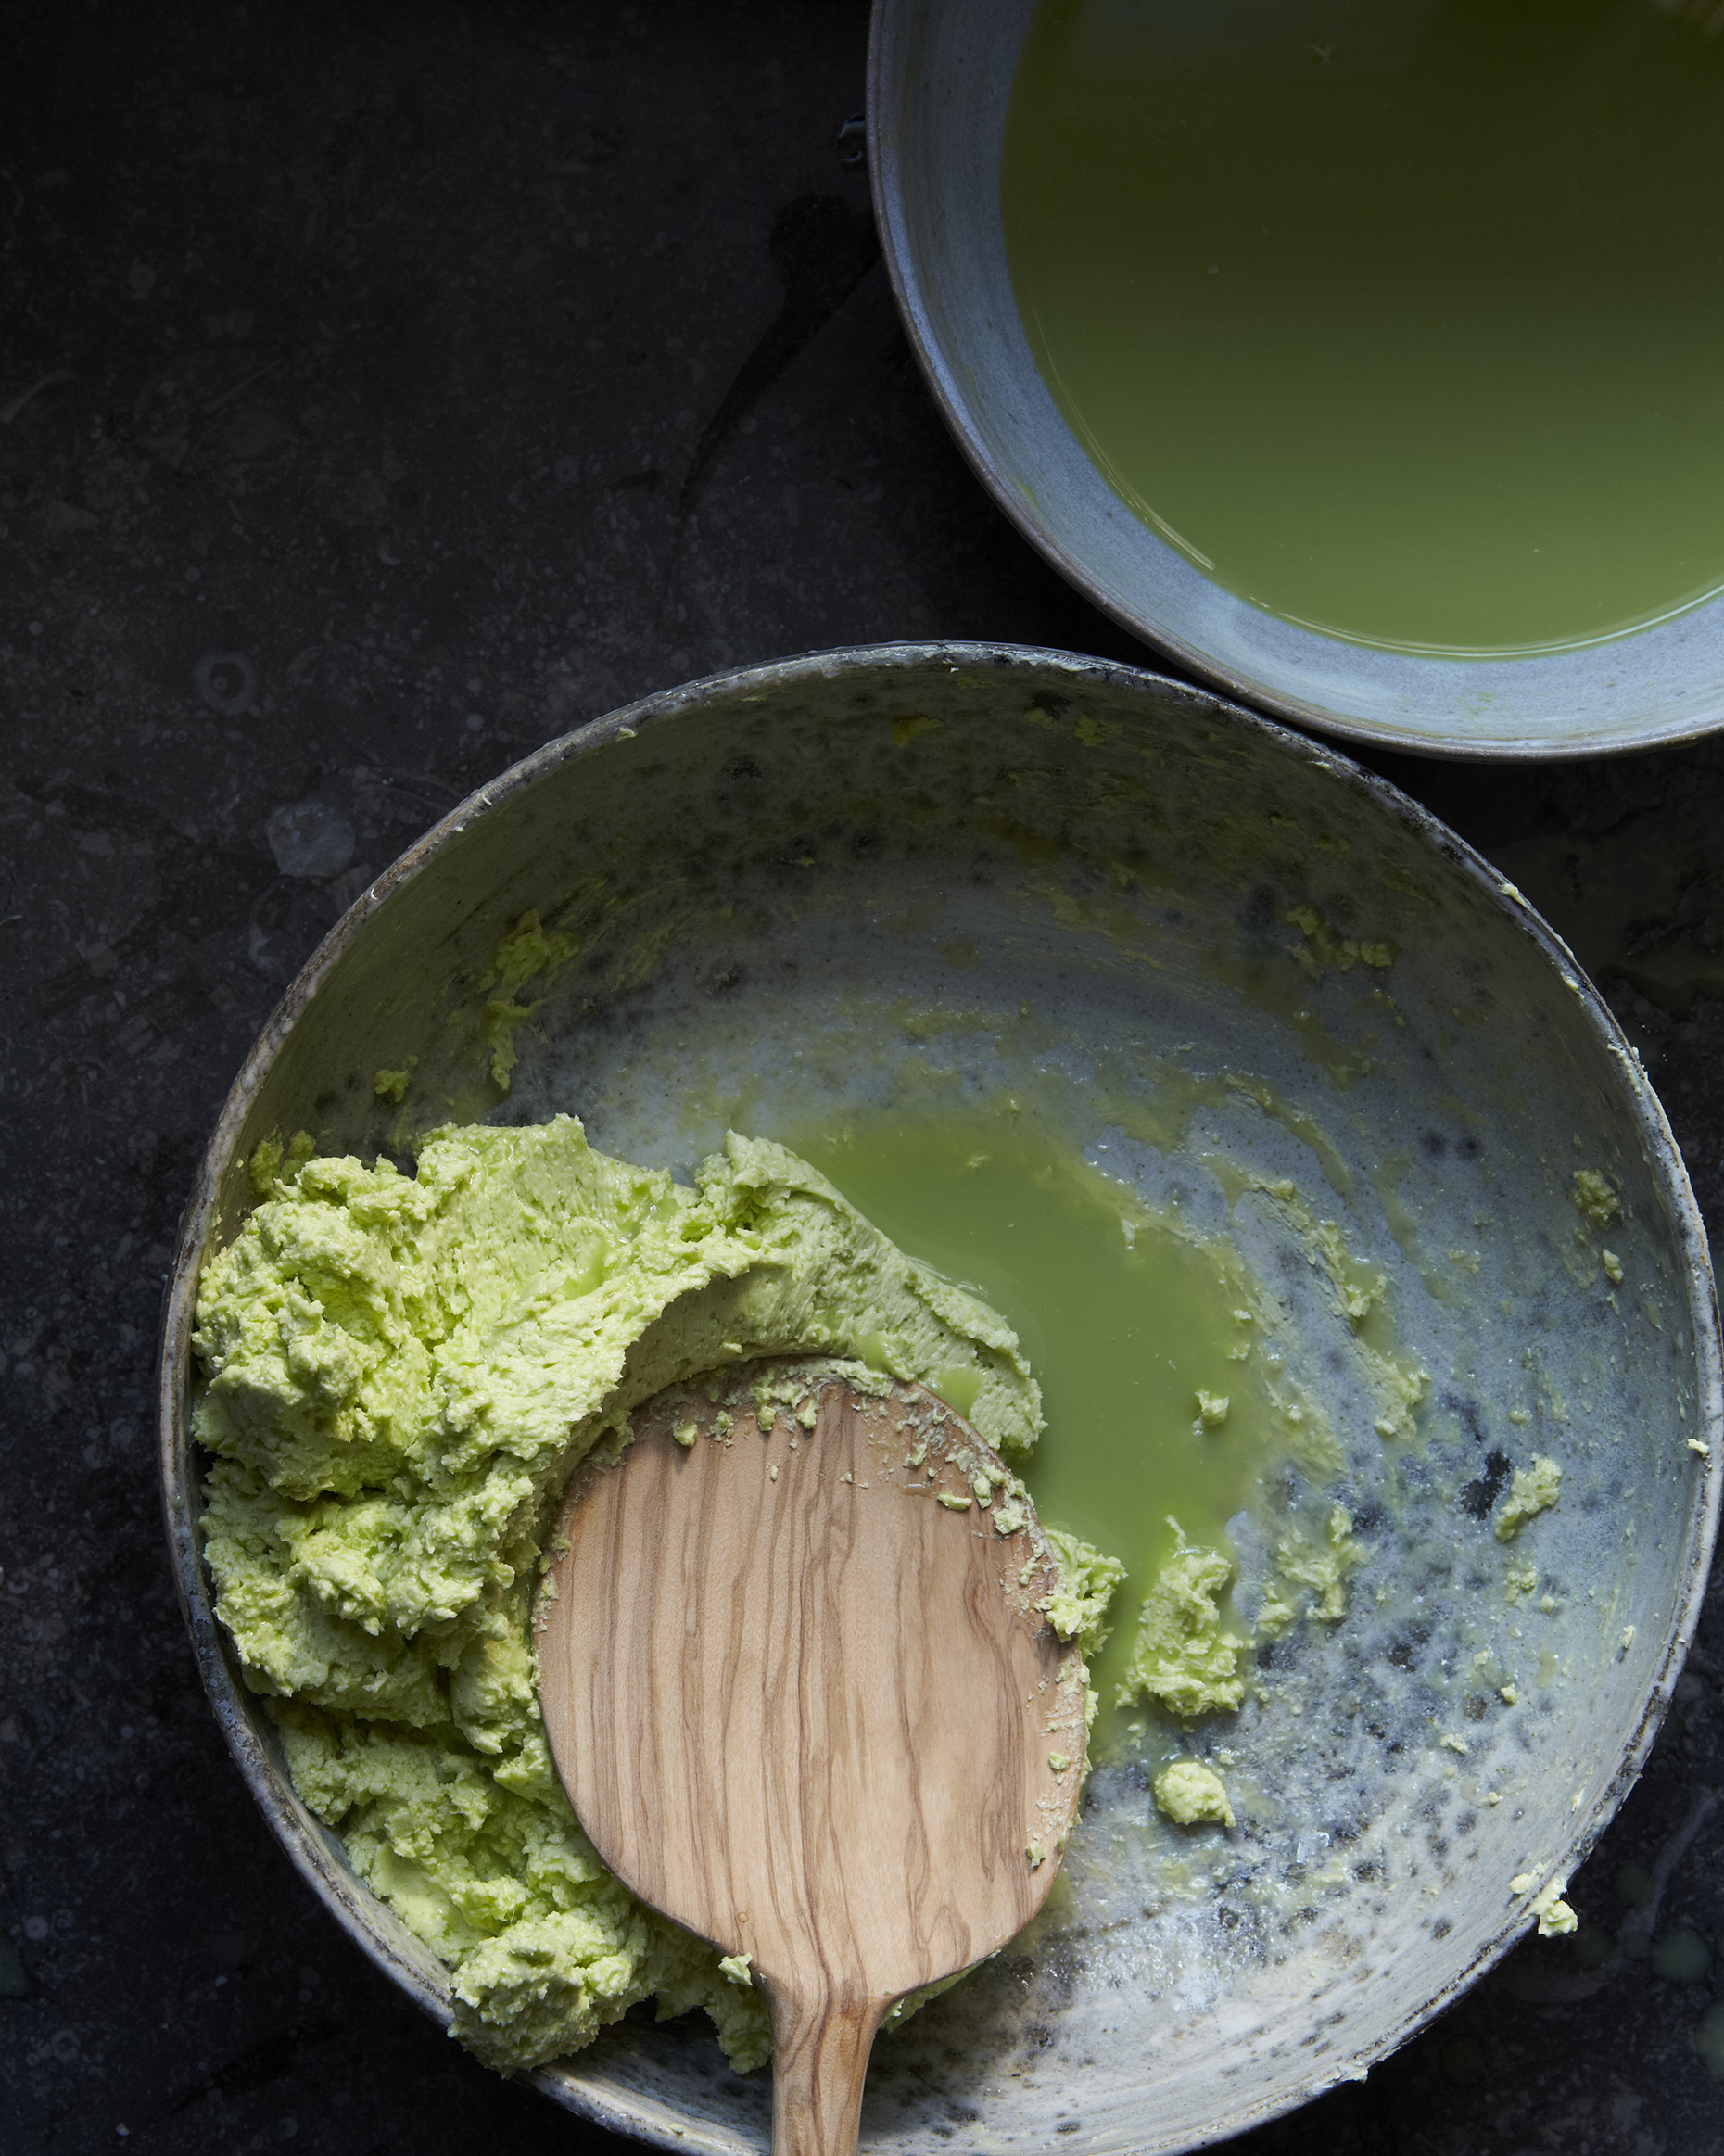
With a wooden paddle or a large wooden spoon start to fold the butter over itself pressing down as you do so. You will be forcing any excess buttermilk out of the butter by this repeated action. You are also "working" the butter. This was essentially what a butter paddle was for. Keep doing this and draining off any excess buttermilk into your reserve.

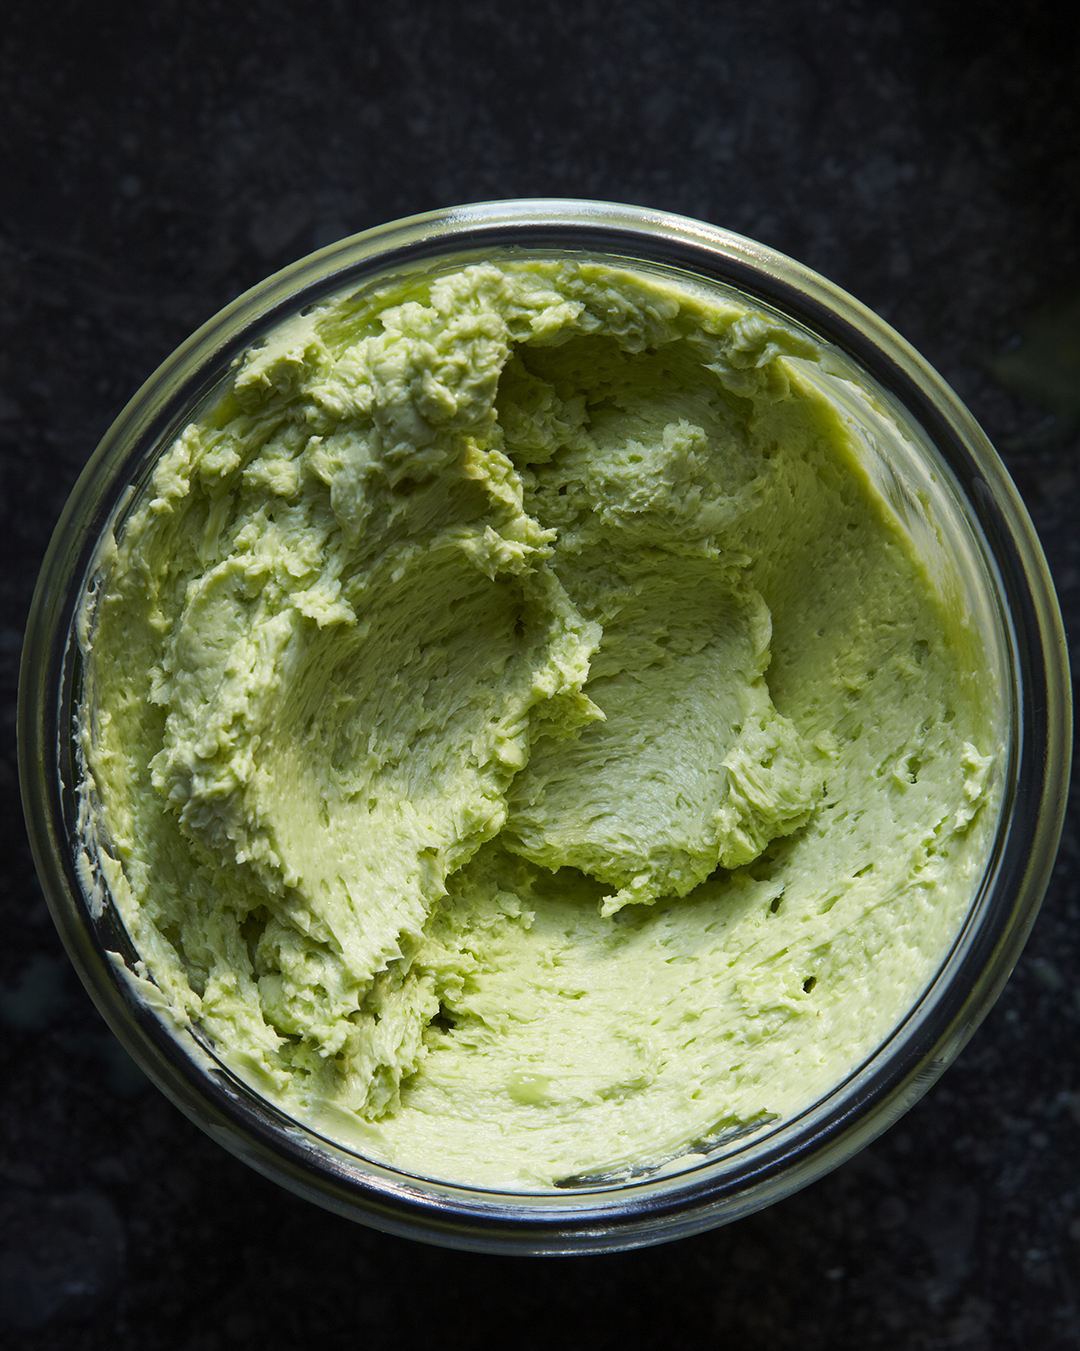
Eventually the butter will be free of all buttermilk and you are ready to store it.

You can either form it into a log or wrap it in plastic wrap and parchment to freeze for later use or you can store it in an airtight container in your fridge, I like to use glass.

It will keep indefinitely either way. If you freeze a big batch you will have it all year to throw into pastas or on steak. It is so delicious and so very different from the standard ramp butter I have seen floating around. You might have to be careful to not eat it straight! It is that good!


I hope you don't find this daunting. It is really very simple and once you do it you will find yourself making all kinds of flavored butters or maybe just fresh spring and summer yellow butter. 

Ramp Butter


1 pint of fresh cream

10 ramp greens 

10 ramp bulbs

1/2-teaspoon salt

Chop the ramps and bulbs coarsely

Add  the chopped ramps and the cream and salt together in the food processor.

Start your butter on high speed.

It will combine to a spread like texture within a minute or so. You can stop here if you want to use it like this.

At this point the buttermilk has not yet been separated from the solids.

I keep it going for another five minutes or so. You will at some point see the solids separate out from the darker green liquid (ramp buttermilk) in two bands along your processors edge.

I keep it going past this point until the butter starts to clump in small chunks and grains along the processors walls.

Continue following the instructions above.


Nettle Butter

1 pound of fresh stinging nettles

1 pint of heavy cream 

1/2 teaspoon of salt


You can make nettle butter following the same basic instructions with a few exceptions.. Start with a pound of fresh nettles. Use gloves when washing.

Blanch the nettles until bright green. (30 seconds or so)

Remove with a slotted spoon and squeeze the excess water from the nettles until the form a ball of what looks like frozen spinach.

Coarsely chop the blanched nettles and add to 1 pint of cream and 1/2 teaspoon of salt


Follow the same steps as above.

Here is a much less long-winded post on how to make cultured butter from food 52


Monday
Apr222013

egg. currently obsessed. how to boil an egg.

Spring is upon us even if a windy chill lingers in the air. I love this time of the year. The farmers market is bursting with ramp and spring onion and eggs of all sorts! I love the pullet eggs from the Amish Farmer at the Friday Green Market. They are so sweet and small. I have a soft spot for the newly laying hens that have come through their awkward and gangly teenage stage. This time of the year you will start to see duck eggs and goose eggs and quail eggs. The smaller pullets are perfect for Toad In The Hole, Egg In A Nest, or Egg in The Middle; whatever you may call them. Because of their small size, they sit perfectly in that cut out hole in the bread without running over the sides. We are big eaters of Egg In A Nest as we call them in our house. There is something so right about a buttery fried piece of bread with a perfectly done egg in the middle of it. It is both crunchy and soft and best when generously salted and peppered. We had chickens when I was growing up. We had Arcanas before it was cool. I have to thank my dad for that. He was into off beat breeds, hence the Sicilian Donkeys and Scottish Highlanders. We called our Arcanas Easter egg chickens. We bartered our plethora of eggs with neighbors for things like syrup or meat and gave them to pretty much anyone who happened to walk in the door. Some hens are prolific layers and one can quickly find oneself overrun with eggs!  If you find yourself in this situation or if you just want to celebrate spring's bounty, pick up a copy of Phaidon's How To Boil an Egg. It is the new book from Rose Carrarini of Rose Bakery on Rue des Martyrs in Paris and it is all about eggs! It seems deceptively simple but let's face it, the incredible egg is at times challenging and incredibly versatile. Here its secrets are revealed. How To Boil An Egg is gorgeously illustrated by botanical illustrator Fiona Strickland, with hyper real drawings that look like photographs. This is a lovely book filled with simple staples and a few surprises.


 quail egg © 2013 Andrea Gentl


llustration Fiona Strickland 


Egg In The Middle 

From How To Boil an Egg

Rose Carrarini


2 slices of bread, preferably whole wheat

2-3 tablespoons olive oil

2 eggs

First stamp a circle from the center of each slice of bread with a 2-inch cookie cutter and reserve.

Heat 2 tablespoons of the oil in a frying pan or skillet over medium heat, add the bread and reserved rounds ('hats') and fry until the undersides are lightly golden.

Turn the bread over, adding more oil if necessary.

Carefully break the eggs and ease them into the holes. (Sometimes I drain off a little of the white, but this is not a rule.)

Reduce the heat and cook until the whites are set and the yolks are beginning to set, but are still soft.

Using a spatula, transfer the slices of bread and eggs to a plate, with their hats over the yolks, and serve.


Now saute up some of that ramp, pea shoots or wild mustard you have kicking around and serve it on the side!


Saturday
Apr132013

where the wild things are. salted and pickled cherry blossoms

The bright weather this past week, though a bit cold, has really making me think spring! Pretty soon the West Village will be flush with blossoming Magnolias and Quince and Cheery blossoms. It is one of my favorite times of the year in New York and always reminds me of home. 

For me the seasons have always been marked by the comings and goings of botanicals. It is a little harder to notice these changes in New York unless you have a back yard or a country escape. To get your fix, you can visit the Green Market or make time to visit the Botanical Garden, which is just spectacular in the early spring and summer. You can also set out to explore one of New York's beautiful tree lines streets like many in the West Village or Brooklyn.


Recently, I needed salted cherry blossoms for a shoot and when the Internet came up empty (you can order them fro Japan but it would have taken too long) I have to admit I had never heard of them! I turned to Heidi Johansen from Bellocq Tea Atelier. I knew that if any one had a stash of salted blossoms it would be her!! Heidi is kind of magical and she produced these mysterious salty pink flowers of nowhere!

Now that the season is upon us, I have decided to create my own stash.


Sakura tea, or salted cherry blossom tea is often served at weddings or other auspicious events in Japan. It has a delicate salty and sweet flavor. It is fragrant and woody. The saltiness obviously comes from the salt but the sweetness is imparted through the flowers natural flavor and additional soaking in Plum vinegar.

Salted Cherry Blossoms 

2 cups of fresh cherry blossoms.

IF you have a  cherry tree in your yard you can pick from there or you may be able to pick up some branches from your local farmers market but be sure to ask if they are natural and pesticide free. You will want to pick them before they are full bloom when they are buds to a little more than half bloom. 

6 tablespoons of Japanese pickling salt

6 tablespoons of Plum vinegar

Wash the blossoms and set on a paper towel or kitchen cloth to dry. Gently pat until all the water is removed from the blossoms.

Place in a pickling croc or a shallow terra cotta croc.

Place a plate or a lid on top of the flowers. You will want this lid to fit nicely in your vessel. (I used a plate)   Then weigh it down with a weight of some sort. I used a river stone. You can buy a fermentation croc or you can use a vessel that you already have and weigh it down with a homemade weight.

Leave it in the fridge for two days. The salt and the pressure of the weight will force any liquid from the blossoms. 

After two days remove them from the fridge and drain off any excess liquid. My blossoms did not express much liquid.

 After draining any excess liquid. Place the blossoms in a glass bowl and add the Plum vinegar.

 Cover  and Refrigerate for another three days.

After three days strain the flowers through a sieve to remove any vinegar. Spread them out on a baking sheet covered in parchment.

Sprinkle thoroughly with pickling salt and set on your counter in the sun to dry or outside in a protected spot.

Allow drying for two or three days.

When the flowers are completely dry they are done. they will discolor a bit.

Store in a glass jar and cover tightly. They are preserved will last indefinitely.


Finally you can enjoy a cup of Sakura tea!

Boil some water and drop three or four petals in your teapot.

Don't be shocked! It is salty! It is an acquired taste!


Sakura Rice.

Rinse a handful of blossoms to remove excess salt.

Add to your rice in a rice cooker or on the stove. The blossoms will impart a lovely pink color to your rice.


 Here are some more ideas on what to do with salted cherry blossoms.

Below is a recipe from T Magazine


Salted Cherry Blossoms Adapted From Uni Sashimi Bar

2 cups rice vinegar
¼ cup sugar
½ teaspoon kosher salt
1-inch piece fresh ginger, smashed
1 umeboshi plum (available at Japanese markets or health-food stores)
½ teaspoon grenadine syrup
8 ounces cherry blossoms, or other edible blossoms.

1. Combine all ingredients except the cherry blossoms in a medium saucepan and bring to a boil over medium heat, stirring to dissolve the sugar.

2. Put the cherry blossoms in a heat-resistant container and pour the just-boiled liquid over them; stir gently to submerge the flowers completely in the liquid. Cool, cover tightly and keep in the refrigerator for at least three days before serving. The pickled blossoms will keep several weeks in the refrigerator. Makes about 1 cup.


Some other ideas..

Chop afew of the blossoms up extra finely and use as a special salt.

I am also thinking Salted Cherry Blossom shortbread?

Need to experiment with this one. 


This beautiful tea pot and cups from Jessica Niello at The Perish Trust